Sketchbook and Theme Book

This is a fun idea along the lines of sketch crawling – a ‘drink and draw’ night at the pub. Subject is drawn out of a hat. Kids loved it!

IMG_2297

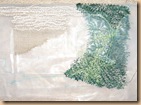
Full size cartoon for my sisters House Book cover, and some stitched samples. Some of the photos are awful – they are stitched on dissolvable stabiliser and the reflections are beyond my photographic skills!

IMG_2300IMG_2339IMG_2340IMG_2341IMG_2342

Sketchbook, page by page:

IMG_2301IMG_2302IMG_2303IMG_2304IMG_2305IMG_2306IMG_2307IMG_2308IMG_2309IMG_2310IMG_2311IMG_2312IMG_2313IMG_2314IMG_2315IMG_2316IMG_2317IMG_2318IMG_2319IMG_2320

IMG_2321File0001File0042IMG_2322

Playing around with computer embroidery:

IMG_2323IMG_2325IMG_2324IMG_2326

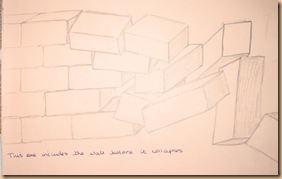
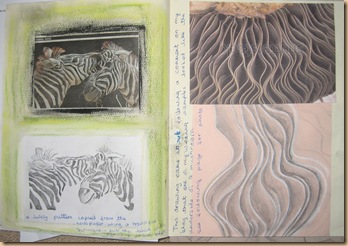
Theme book. Began as pattern and order in nature, evolved into pattern and order in general, then disorder and chaos.


IMG_2327IMG_2328IMG_2329IMG_2330IMG_2331IMG_2332IMG_2333IMG_2334IMG_2335IMG_2336

The following pictures are in light pencil on coloured paper and have not photographed or scanned well:

File0038File0037

File0039File0040File0041

Currently my final piece is likely to be a quilt. This is a large (1m X .5m) collage of the idea at this point.

IMG_2343

What have you Achieved?

Did you have enough variety in your collections of yarns and other materials?Which kinds of yarns did you use most? How do their characteristics affect the look and feel of each sample? Yes, I think I found a wide variety of yarns to play with. I used a mixture of wool and found materials. A great deal of the sample work was done with torn or cut strips of various fabrics and plastics. I like them because they invariably create an interesting texture and the characteristics of the fabric are often transferred to the weaving – for instance fleece strips make a lovely soft weaving whereas plastic can be hard and brittle.

How did you find weaving in comparison to the other techniques you have tried? Did you find it slow or too limiting? I loved the weaving projects. Actually creating fabric from yarns is very satisfying, and while it is challenging to create certain shapes or effects I wouldn’t call it limiting – but it is very, very slow! This can be therapeutic and comforting, but with deadlines approaching…………

How do you feel about your finished sample? Are you happy with the relationship of the of the textures, proportions, colour and pattern to the finished size?Is there any part that you would want to change? If so, try to identify exactly how and why you would change it. I’m pleased with my finished sample; I think I managed to achieve the look I wanted using materials that came from the recycling bin and my Mum’s big bag of leftovers and doing this not only made a statement about how we are treating our planet but created some interesting textures. There is a part I would like to change; I continued the textural variety on the planet into the sky, and then decided that I wanted more contrast between the two, and switched to making the sky smoother with a more subdued choice of materials. At the time I did not go back and unpick the first bit of overly textured sky, and to do it now would be incredibly difficult and inserting a new patch may look worse than leaving it.

Was there any stage in the whole design process, such as choice of source material, deciding proportions, choice of yarn or colour, translating idea to sample, that you felt went wrong? Would you tackle this process differently another time? The above mentioned mistake comes under almost all those criteria!  This was caused by my ‘seat of the pants’ approach – I should have planned more carefully and thought about the relationship between the two parts of the work beforehand.

Which did you enjoy more – working form the source material or putting colours together more intuitively? Why? Without question, I prefer working intuitively. I find it very difficult to plan ahead, I just want to get on with it. I will have thought about it a great deal – while walking the dog, working, cleaning the house, I am always thinking about and planning my project, but I am poor at taking that extra step and getting the ideas down on paper before starting the project. I feel it is a sort of first draft; if it doesn’t work I’ll change it or start again.

Project 9 – Stage 4 – Developing Design Ideas into Weaving

I have chosen to work from a word for this final sample. My word is ‘blue’ and I confess to an ulterior motive – ‘blue’ is the theme for the Autumn Open Exhibition at my local gallery, and I hope that the piece will be good enough to enter.

Blue is an emotive word, ‘the colour of the heavenly, the divine and the spiritual; a symbol of infinity, fidelity and of loss’. As a description of mood it is downbeat, signifying depression, low spirits and gloom. It has religious connotations (Mary’s dress is always blue) symbolising purity, but blue jokes are racy and the air can be blue with profanity so it is a word full of contradictions.

Prior to the discovery of chemical dyes obtaining blue pigment was expensive and/or difficult, be it from Lapis Lazuli, Woad or Indigo and as such was inherently valuable; even today there is a mystique surrounding the use of indigo.

In the natural world the sky and sea are blue, as is our planet when seen from outer space. As this last encompasses all the other other blues I chose this well known image as my inspiration for my final sample. To add another layer of meaning to the piece I wanted to give some thought to the state of our long suffering planet and decided that to as great a degree as possible I would use recycled waste materials as the yarns in my weaving.

12693838-earth-in-open-space12705433-beautiful-glowinf-blue-planet-in-spaceplanet_earth1relief-Earth-space-Asiastock-photo-alien-blue-planet-in-space-on-a-dark-blue-background-32007901stock-photo-planet-earth-seen-from-outer-space-with-some-stars-15407086stock-photo-rising-sun-over-earth-illustration-copy-space-for-your-text-31558438

152029

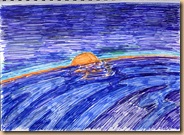
The above thumbnails from Google Images give an idea of the sense of awe and wonder I am after, but apart from the fact that they are probably copyrighted they would be beyond the scope of this fledgling weaver to reproduce. The last one however is from the Bridgeman Education Library, and so is copyright free; it is a 1970’s oil painting by the Russian cosmonaut Alexei Leonov called ‘Sunrise in Space’. I thought the largely horizontal lines would be suited to the medium of weaving;  it is the jumping off point for the drawings below.

File0025File0027File0032File0033

I then reproduced the last one on graph paper to serve as a cartoon to follow with the weaving:

IMG_2271

The finished product

IMG_2284

I’m pleased with this, but the photo above makes it looks more polished than it is, losing the effect of the plastics and found materials I used. The image below is a scan, which is slightly better, but I couldn’t fit the whole thing in the scanner!

File0026

Project 9–Woven Structures

Stage 1 – Preparation

Step one, obviously, was to make a frame for weaving.  I came up with a simple set of instructions for a frame including a set of leashes on this website.  There are a variety of others on YouTube, but I liked the idea of the leashes for opening the alternate shed, making the weaving process easier and quicker.

IMG_2264


Stage 2 – Basic Tapestry Weaving Techniques

This was really fun! I had been looking forward to the weaving project and I wasn’t disappointed – time consuming and tricky, but very satisfying to actually create cloth out of yarns and string. I worked my way through the different techniques in the workbook and this is the result:

File0017

I deliberately didn’t get too wild and woolly with the yarns at this point because I wanted to concentrate on the techniques. I used mostly wool, which weaves beautifully, and used black and white to show the effects of different patterns of weaving. I tried various Soumak knots and cut and uncut Ghiordes knots, and a few experiments with weaving in clear polythene, cut up T-shirts and cut strips of fleece.

Stage 3 – Experimenting with Different Materials

File0015

The first section is some wild silk, whatever that means, that I bought online from Texere Yarns. It is a rough, natural fibre that I mixed with terracotta coloured threads pulled out of some upholstery trim. They make a nice subtle blend.

File0016

Next I used thin strips of polythene cut from a big plastic bag, combined with some fine silver machine embroidery thread. The idea was that the polythene would be invisible and the silver threads would float in space. Not quite, but interesting non the less. I also played around with a combination of Soumak and Ghiordes knots in the metallic thread.

File0016 (2)

The red and blue is done with thinly cut strips of fleece. It makes a nice soft fluffy fabric, covering the warp easily, and the colours blend together nicely.

File0016 (3)

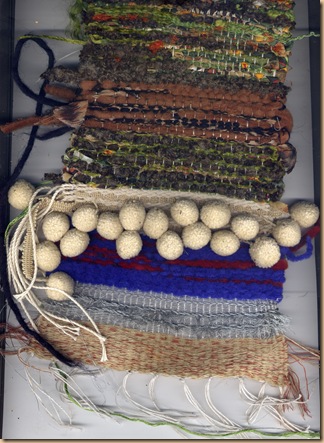
I like the next one. I used rows of warp thread, with rows of bobbles in between. The twist on the warp thread creates an interesting texture, and the bobbles are fun, though they do hide the underlying effect.

File0013 (2)

Another experiment with fleece strips, this time mixed with some thick black wool and cut strips of a leopard print silk chiffon. It’s OK, but not as exciting as I’d hoped.

File0011

The green one was more interesting; the small sample is a mixture of cut strips from an old boucle knit dress, some chenille yarn and cut strips from a cotton print of tree frogs! The cotton print brings it alive because it has some splashes of orange and yellow.  This is ultimately the sample I chose to develop for my larger sample, adding more and brighter greens, and some Ghiordes knots done with the ubiquitous orange fruit bags from the supermarket. I had the photo of lichen and moss (and some previous development in collage and felting) in mind as I did it.

File0013 (5)

File0013

065

IMG_1904File0088

All in all, I’m pretty happy with my first foray into weaving. I found the reading and research I did beforehand was time well spent; I didn’t get lost and frustrated as I did with the printing/painting projects.

Marla Mallett

I came across Marla Mallett’s website while looking for some instructions on making a simple loom for the Project 9 samples; I wanted a slightly more sophisticated set up than just an old picture frame, my thinking being that some sort of heddle would make the weaving process easier an faster.

Not only did I find exactly what I was looking for regarding the loom instructions, I found a wealth of information about the history and construction of woven textiles from all over the world.  As a weaver herself – a retrospective of her own fabulous work is also on the website – Marla takes a deep interest in the provenence of the pieces she sells, and I found a my visit to her website enriching and inspiring.

I am very tempted to order her book, ‘WOVEN STRUCTURES, A Guide to Oriental Rug and Textile Analysis’ but being in America fairly hefty shipping charges apply – making the cost rival that of Alice Kettles latest…….!  Hmnn, having just been to Amazon to set up this link, I see Alice Kettle has a new book coming out in October (‘Hand Stitch; Perspectives’), and ‘Machine Stitch; Perspectives’ is on sale……what’s a girl supposed to do?


Project 8–Stage 2–Exercise 3

Here we are asked to prepare a rigid frame. I chose some dried branches I had trimmed out of a twisted willow because I thought the twirly shapes would be interesting to work with. I was afraid it would be difficult to fasten into a stable shape but I found that raffia is excellent for binding corners – it seems to hold even before the knot is completed. I suspect this is why it became a common material for weaving, making baskets etc. When I read the brief my first thought was that it sounded like a dream catcher, which usually have some sort of central motif, so I made two frames to fit one inside the other.

dremcatcher2

This photo, along with a nice history of the dream catcher can be found on this website.  As it is offered there for information and interest, rather than for any commercial reason, I believe the author would not consider me doing the same as a copyright violation.

We were asked to consider the effect of light and space between the yarns, and with this in mind I chose very fine wools in a variety of natural colours to create a lacy effect and to contrast with the fairly chunky frame.

IMG_2221

I took a picture with the ‘dream catcher’ hanging in the window, but I thought the garden behind it was distracting, so I took some more with it held up to the translucent roof of my conservatory, which involved considerable contortions and not being able to see the image in the screen on the camera!

IMG_2212IMG_2215

The close up on the left illustrates that when the light is behind the structure everything shows in silhouette, whereas in the one on the right, taken against a dark tiled floor, shows the colours better. In real life the sheen on some of the yarns showed to good effect in the light.

IMG_2218IMG_2222

Exercise 4

To make the rigid grid for this exercise I used the dried grass stems that had proved too stiff for weaving. I had hoped their springiness would hold them as I expanded the grid, but it didn’t. I ended up having to tie each intersection together temporarily, removing the tie after a decorative weaving was done in its place.

IMG_2223IMG_2228IMG_2227

I decided to work with shiny metallic threads and wire, as contrast to the rustic grasses, and in an effort to move away from natural materials, which seems to be my default setting. I enjoyed working with the fine wire; I liked the way it stayed put and was relatively easy to fasten off by winding it around the grid. In contrast the light weight metallic threads were all over the place and very fiddly to work with.

IMG_2239

By way of experimentation I tried a freer wrapping with the metallic thread and a couple of complete failures, where I tried to melt Tyvek and some gift wrapping ribbon onto the frame. I didn’t do anything with the Tyvek when I bought some for the previous project, so I thought I’d try it here. Perhaps if it was sewn to the frame first so that it couldn’t just shrivel up and disappear I’d have had more success!

IMG_2240IMG_2241

What have you Achieved?

Did you enjoy inventing constructed surfaces? Were you surprised at the results? Can you see a connection between your choice of materials and the types of structures you made; for example regular, irregular, small or large scale? Which samples worked best?  I enjoyed this project very much – there is a great satisfaction in building something from scratch. I’m not sure I was surprised at the results, I think I had a fairly clear picture in my mind of what I was trying to achieve.  There is most definitely a connection between the type of material and the finished object – every medium has its own properties and limitations. I worked with wood and wood-like materials which were dry and not very flexible, so the finished sample was quite two dimensional. I would like to work with metal or wire that could be bent into three dimensional shapes. I think the dream catcher worked best; it has a simplicity that allows the materials to work together naturally. Some of the fine weaving on the grid is a bit fussy.

How accurate were you in matching all the colours in your postcard:

  a) with paints?

b) with yarns / other materials?

I think my colour matching was pretty good in both instances. It is obviously more difficult to find an exact colour match in the right texture with yarns but it is very satisfying when you do find just the right thing.

Project 8, Stage 2–Experimenting with Structures

Exercise 1:

I thought I’d start this post by sharing a couple of structures I’ve seen recently. The first is called ‘Hedgerow Basket’ by Jane Bevan. I admired her work at the Bovey Tracey Contemporary Craft Fair in June.

IMG_2100

The second I saw as part of a display at the Hampton Court Flower Show, by an unknown craftsperson.

IMG_2155

For my first structure I used some strips I had cut off the edges of a mixed media piece; the paper had been textured with newspaper and tissue paper stuck on with PVA glue before being given a wash of acrylic paint to prepare it for drawing and painting. I cut this up into thin strips and wove them together which gave a pleasing structure with an interesting texture.

File0099

I then decided I wanted to use up some dried grasses that I’d become tired of, with mixed success. Because they were so hard and dry they didn’t want to bend or snug up to the previous row, so I ended up weaving in some raffia to fill the gaps.

IMG_2176IMG_2177

File0100

I also thought it was worth revisiting some weavings I had done for previous exercises:

104

File0004IMG_1666

Exercise 2

I started with the directions for making various plaits in the workbook, using strips of fabric cut from an old polo shirt in a spiral, which makes a nice long ‘yarn’. I also used some rough string which I embellished afterwards in buttonhole stitch with a couple of different shiny yarns to create some contrast.  Then I googled ‘hand twisted rope and came up with this website, which has some simple instructions for making rope – it happens almost by magic and is great fun to do.  I used the shirt fabric again, and some strands of wool. Another website has instructions on making a variety of cords, lanyards. I used the wool again, and for fun some strips of packing foam to try out some ideas.

IMG_2207

I’m sure there are many more ideas on YouTube and the like, And I need to try out a greater variety of materials.

Project 8–Stage 1

Collecting Yarn and Exploring its Qualities

How lovely it would be to just go out and buy any yarn that took my fancy!  It’s all very well to say, as stated in the last line of the brief ‘You don’t need to buy much of any one kind at this stage. One ball or hank is sufficient….’, but when one ball or hank is likely to cost £7 – 8, especially the more interesting ones, then this just isn’t possible for me.  The other thing is that the choice is so wide these days, how on Earth would you pick one over another with out an end use in mind? I already collect found materials as suggested in paragraph 2, so rather than going shopping I am going to have a sort out and review of what I already have.

Ordinary sewing thread: Not to be underestimated! In creating a fabric using dissolvable stabilizer ordinary sewing thread could well form a base for further decoration. My collection is pathetic compared to what I had before moving back to England from Canada; I used to do a lot of dressmaking and had every colour under the sun, but I think I gave them away with the machines I sold. Sob, sob!

IMG_2181

Machine Embroidery thread:  These threads are usually polyester or rayon and have a sheen. They come in different weights and different brands vary enormously in texture and quality.

IMG_2182

My ‘natural’ colour bag:

A variety of synthetic and natural wool:

IMG_2180 (5)

Ribbons:

IMG_2180 (2)

Natural fibres – dried grasses, seaweed, sheep wool and raffia:

IMG_2180 (7)

6 Strand and perle embroidery thread:

IMG_2178

Copper and brass wire:

IMG_2180 (3)

A variety of upholstery trim:

IMG_2180

Threads teased from fabrics and trim, my personal favourite:

IMG_2180 (4)

Black:

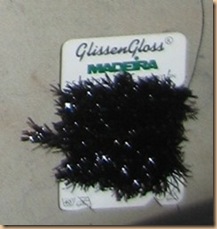
I have ribbons, wool and upholstery trim

IMG_2185 (2)IMG_2183

Interestingly, this small card came from a fishing equipment shop – they had a huge selection of yarns for tying flies, also feathers and animal hair.
IMG_2185

White:  In the white bag there is quite a lot of lace; most of this was inherited from my mother. I like the wire spring which came from the spine of a notebook, and there are some cotton crochet yarns that have a lovely soft texture.

IMG_2187


Red/pink:  There are a few interesting things in this bag – the dusky pink variegated string and the mesh fruit bags have possibilities, and I love the pink bobbles.

IMG_2188IMG_2191


Blue:  Seems a bit sparse; blue is not one of my favourite colours, it always seems dull somehow. Dull as in boring that is, totally irrational of course. I do like the unspun wool in the left hand picture though.

IMG_2200IMG_2197


Green:  Not surprisingly, lots of green which is my favourite colour, whether fresh and crisp or dark and sludgy.

IMG_2205IMG_2202IMG_2204IMG_2203


Purple: Not much here either, could perhaps be combined with the blue. The beads should really come out of the yarn bag. I am in the process of deciding how to store beads and other trim – I think plastic boxes.

IMG_2206


Yellow/Gold:  Some nice upholstery trim trim here, I think inherited from my mother’s stash.

IMG_2192IMG_2193

Going through everything and recording it all has been a bit laborious, but useful in that has reminded me of what I have and where the gaps are.

Overdue!

Having just been sent a ‘pre-overdue’ notice, along with the information that they have been renewed the maximum number of times, I thought I’d better take a little time to review the following books:

Textiles Today, A global survey of trends and traditions, by Chloe Colchester

51249L7AsnL._SS500_

This was the book I thought I’d get when I bought Chloe Colchester’s previous book, The New Textiles, reviewed here. It is about the leaps and bounds textiles have taken since that first book was written and opens the eyes and mind to some truly astounding technology and artistic endeavours. From architecture (these are my late husband’s photos of  PICT0009PICT0006 PICT0008
the Eden Project) to life saving technology that incorporates both fibre optics and conductive fibres into a garment that could be used to monitor the health of soldiers in the battlefield, and when it comes to art, the sky, or the imagination, is the limit.  My favourite piece is a combination of the two – ‘Neils van Eijk’s Bobbin Lace Lamp, 2002.  A lace lamp made from a 500 metre skein of fibre optic filament. When fibre optic filaments  are forced to conform to conventional lace-making techniques their internal glass sheath snaps as it is knotted, allowing light to escape at these points, thereby making this lace lampshade into the light source.’ I would love to include photos (a copyright no-no) but the book is on the reading list so I hope fellow students have managed to beg, borrow or buy a copy.

Fabrics, The Decorative Art of Textiles by Caroline Lebeau. Photographs by Jaques Dirand, Text by Patricia Corbett

31jQHh mZJL._SL500_AA300_

Forget technology, this is a lovely coffee table book of glossy photographs of the way fabrics have been used to decorate our homes through the ages. Much of it is historical and very traditional – silks encrusted with hand embroidery and the like – but there are some interesting modern twists as well. British textile designer Nigel Atkinson’s “Bamboo Pleat” in silk and latex, for instance, reminds me of our exercises on manipulating fabric. Here, I’m assuming, silk was saturated with latex and folded into tiny pleats before being knotted around cushions and allowed to dry. Or the chairs that have been upholstered by wrapping and weaving around the frames with fat tubes of fabric stuffed with wadding in Tricia Guild’s London house.

Tapestry Weaving, A Comprehensive Study Guide by Nancy Harvey

51-A8EZuBLL._SS500_

This is a useful book outlining in some detail the techniques and tools used in tapestry weaving. It is over 20 years old, and as such has a dated feel and look about it but the information seems sound and clearly explained.

Latest Reading

On picking up the latest of the library books I have ordered over the past few weeks, I noticed that I have no less than eleven of them out on loan. I have been browsing through them in a desultory sort of way but I think it’s time to give them a little more serious attention, and write down some of my thoughts before getting them back.

My tutor suggested I look at ‘The Notebooks of Leonardo da Vinci’, which I have done but confess I found them very hard going. The context in which they were recommended was part of a discussion about how difficult I find it to keep a sketchbook, and notes on my last assignment about how I should be making comments on the work presented rather than just labelling it with the project it pertains to, so I imagine they were intended to illustrate how Da Vinci continually (obsessively?) wrote notes about his observations on everything under the sun. They do not contain, as I had hoped, many of his drawings but copious notes in archaic language about everything from his well known interest in anatomy, warfare and engineering to strange fables and the nature of truth. Sadly I found his observations on light and shadow and other ‘painters precepts’ as he called them almost impossible to understand because of the language which is a great shame as who better to guide a budding artist than Leonardo Da Vinci! However, I take the point that literally everything is worthy of study, notation and drawing.

It is possible that I would not have been so overwhelmed by a more modern edition; there are literally hundreds of works with this title on Amazon but the one I had was a two volume tome first published in 1938.

L da V


In light of my chosen theme book subject – Pattern and order in Nature – I thought it would be a good idea to have a look at the work of William Morris. I have always loved his fabrics and wallpapers, and after attending the study day at the William Morris Exhibition in October of 2011 I realised there was a lot more to the man than than meets the eye and this only increased my admiration for his work. I chose three volumes from the library catalogue, which proved to be remarkably similar – a brief biography and colour plates of his designs. For this reason the most useful was the biggest! ‘William Morris Designs and Patterns’ by Norah Gillow. A large book, some 15” X 11” it contains 40 colour plates which show his use of natural images.

41Ie0p1GsBL._SL500_AA300_

Previous Older Entries